


by KATE SHUNNEY
Fred Henry can make a crisp paper box, complete with fitted lid, in less time than it takes you to drink a cup of coffee.

Mr. Henry folds in the last side of a paper box made of a single sheet of paper.
He’s pretty quick about it, having made countless numbers of them over 30 or 40 years.
Henry, of Berkeley Springs, gives away a lot of colorful, flower-topped boxes around town. Sometimes, the 2.5” square lidded box contains two or three pieces of candy. Younger folks will pull the lid off to find a small car or other toy.
Mr. Henry might pull up in front of your business and drop one off for each person at a holiday, or catch you outside Roy’s and hand you one. The box could have a lid made of a page from a cookbook, or a glossy magazine. It might have a stain ribbon trimming the top and sides, a flower glued to the center.
“I keep some in the car. Down at the house, I have 300 or 400 made,” he said.
Mr. Henry’s box-making hobby started around 40 years ago, he figures. One day he looked in The Martinsburg Journal and saw a diagram there about how to make paper boxes. He cut it out and started making them. He hasn’t stopped yet.
“I do it a lot of a night,” Henry said.
His son Greg owns three stores in Martinsburg where he sells jewelry, West Virginia glass and antiques. Henry makes the gift boxes for the shops, and a lot around Christmas time.
He said he needed something to do with his time after retiring in 1981 from the Martinsburg VA Center, where he had worked as a Nurse Assistant. Mr. Henry worked at the VA for more than 33 years, having taken a job there two years after he was discharged from the U.S. Army.
A World War II veteran, Henry was drafted in February of 1944 and served through February 1946 with the 236th combat engineers in India, Burma and China. His wartime service included time on the Burma Road, he said.
Back from war, Henry met and married his wife, Charlotte. They would be married for 71 years. She worked for many years at Dugan’s Supermarket, and passed away two years ago.
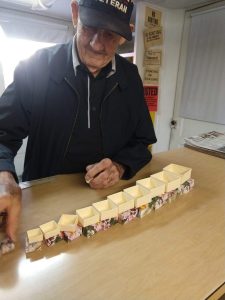
Fred Henry opens the last of 12 nesting paper boxes he made as a set. The final box contains a miniature pen knife, part of his collection of knives.
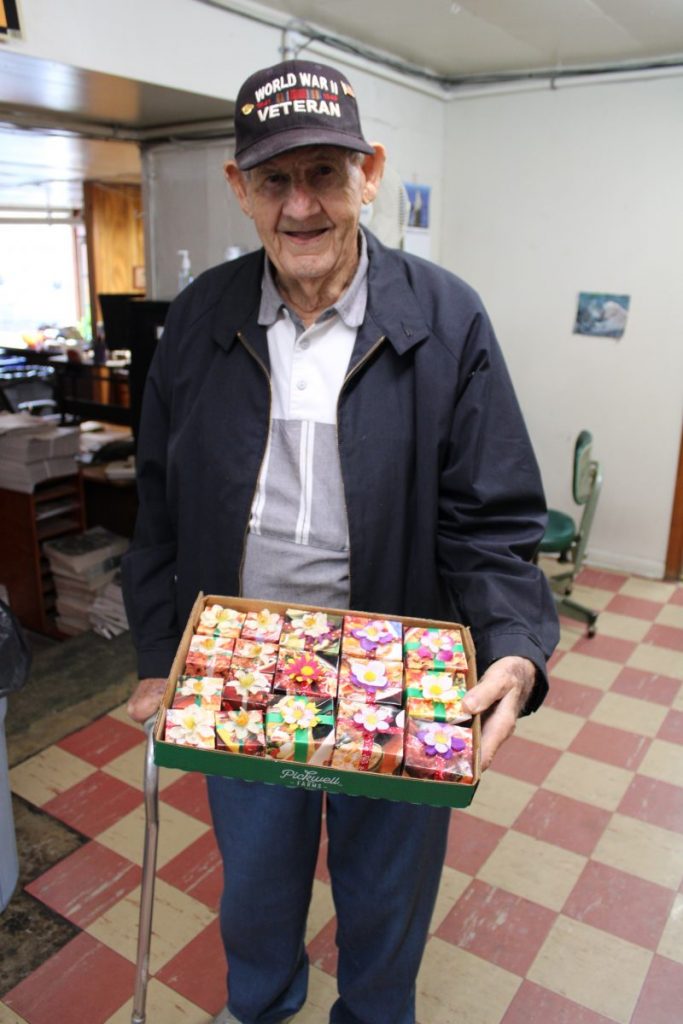
Fred Henry holds a boxful of his handmade decorative boxes.
Henry said he expects to keep making boxes, and Christmas time will keep him busier than usual.
Each paper box looks like and is a small gift – one he’s been giving away for decades. There are a few special ones he keeps – a box made of a picture of he and Charlotte as a young couple, and a set of 12 nesting boxes that open up to smaller and smaller cubes to reveal, finally, a miniature pocketknife.
While a beginner might struggle to shape the sides straight, or tuck in the folds properly, Mr. Henry’s fingers follow their own steady pace.
It’s precise work, starting with a clean-cut 7” square of 67 lb. heavyweight paper. On that, he marks a perfect X from corner to corner. The finished box with make the X, the folds and small cuts disappear into a self-contained piece of geometry.
“I’ve never sold one. I’ve given thousands of them away,” he said.
Mr. Henry’s guide to making a paper box with lid
- Cut heavyweight paper into 7” by 7” square. Draw an X from corner to corner. This is the lid.
- Take each corner of the paper and fold to the center line.
- Make a second fold on each side, bringing the outer edge of paper to line up with the center line. Flatten the fold.
- Repeat all around the square.
- Flatten the paper out and draw the outline of the center box created by the creases.
- Cut from the edge of the paper along a crease to the corner of the center box. Two cuts on one side of the paper, and two cuts on the facing side. Stop the cuts at the corner of the inner box you drew.
- Fold points back into the middle, starting with the two longest sides. Fold into upright sides. Fold the long, pointed ends of those sides inward, creating two sides with connecting folds.
- Fold remaining two points in and over the first two sides, tucking the points into the center of the box.
- Glue pieces in place, if desired. Cut square to fit the inside of the box. Glue in place to finish.
- Cut heavyweight paper into 6 ¾” by 6 ¾” square and repeat steps to make the box base.
- Place lid on box.


